
I have received some very nice feedback regarding my last blog on D-Bus, thanks guys. This week I'm going to play once more with my Nexenta installation that we completed in part1. This time around I am going to basically demo the integration the Nexenta folks have pulled mixing apt-get with ZFS file-system capabilities, resulting in transactional system upgrades, with multi-snapshots that makes system recovery a snap!
We start off booting our nexenta NCP2-alpha installation, which we'll be upgrading to beta-1 as we speak. Grub shows the default boot kernel
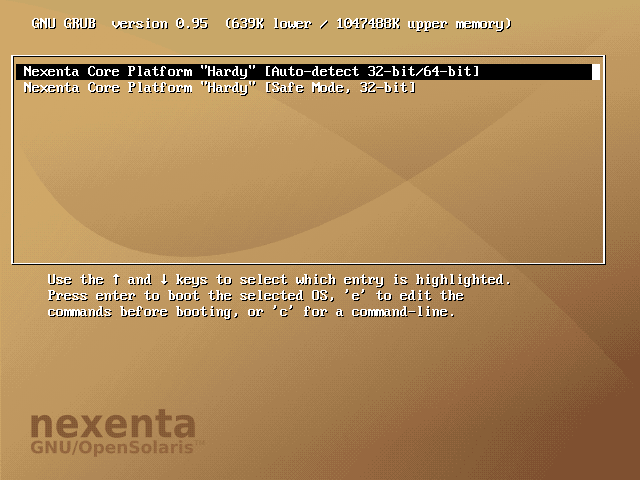
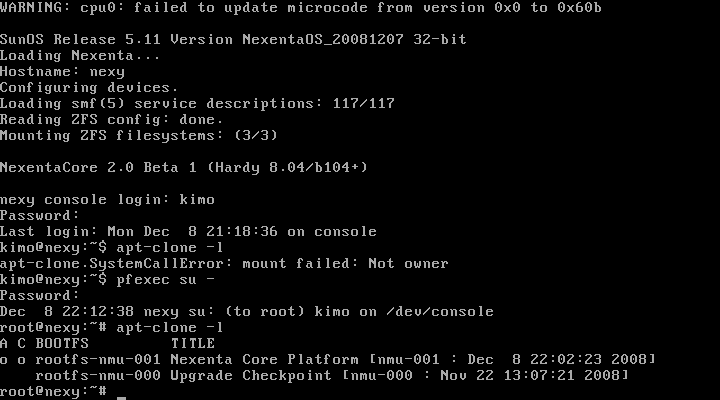
Once booted, and we log in, let's update apt's cache

I have also used the command "apt-clone" to list the currently available boot environments. Basically, using ZFS snapshots the whole machine state is snapshot'ed resulting in a instantly bootable environment. Currently we only have the default environment "rootfs-nmu-000". Now I am going to use apt-clone to "dist-upgrade" the whole system. If this is new to you (who has never seen Ubuntu :) it basically means you're upgrading the whole system to the latest tasty bits

Note that I have used verbose mode "-v" in order to get more information. After a lot of downloading and dpkg grinding, I now have the latest packages installed. apt-clone has created a new system snapshot "001" and the process ends like so
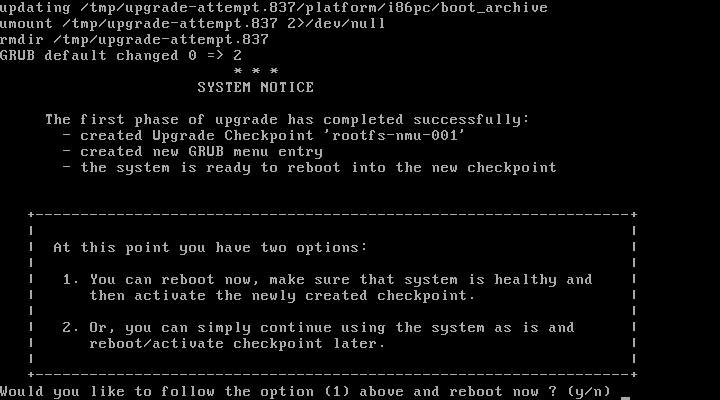
I have simply hit 'n' to discard any automatic changes, then I used apt-clone to activate the upgraded snapshot as instructed by the on-screen output
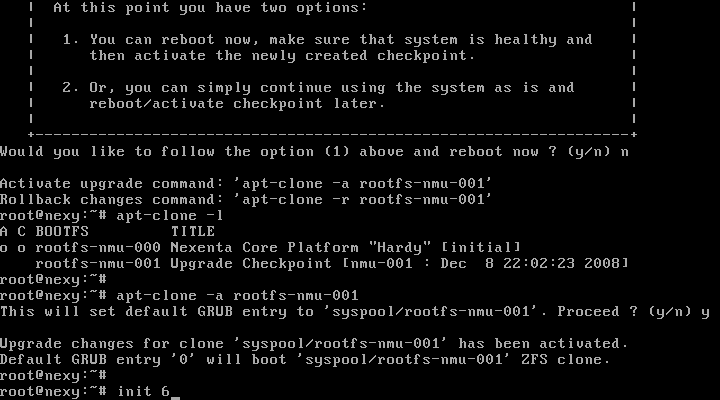
Now let's reboot and see what kind of coolness we have
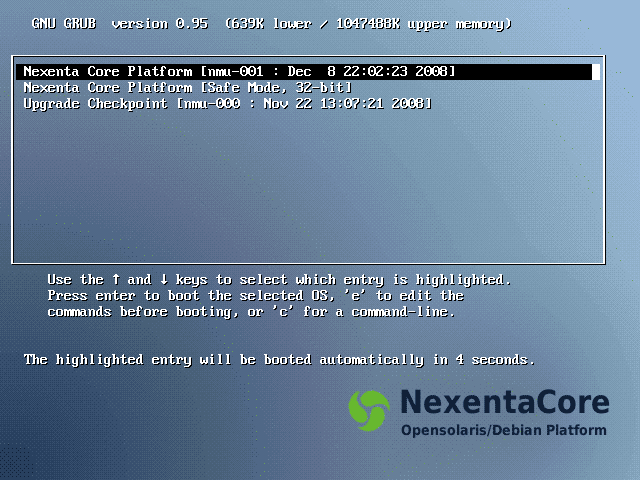
Oh cool, Grub now displays two bootable environments! One before the upgrades and one after. The dates besides each entry make that clear. Great, now let's reboot into the new envrionment and list the available clones (cloned file systems)
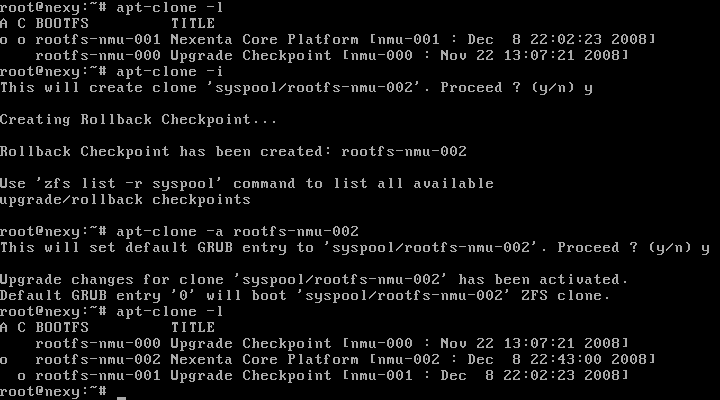
Note that the "A" and "C" in the output mean "Active" and "Current". Great, now creating instant bootable system snapshots like that is so useful that it does not relate to software installations only. Say you're running some third party closed source installation application and you're not really sure what's it going to do to your system. Or if the new clueless administrator needs to install something to the server but you think he's probably going to destroy it! In such situations, it's very helpful to manually create a system snapshot. So, let's do just that to create the environment 002 and let's activate it
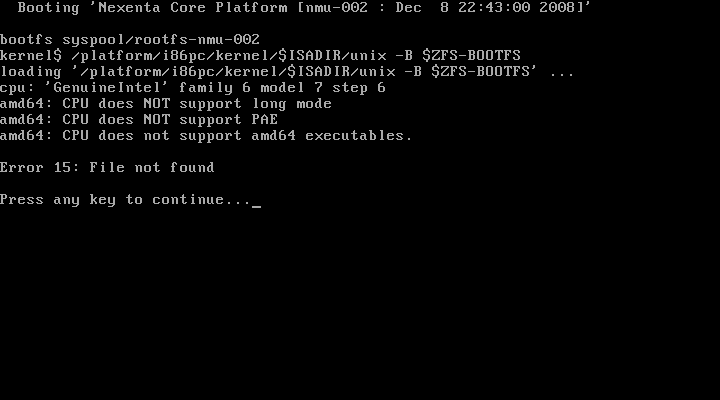
Now we have our own little safety net. Let's now boot into that new environment. Use apt-clone to make sure "002" is the active and current environment. Then's let's simulate complete system failure. I will not be too creative and will simply delete the kernel and reboot!

Once in Grub, boot the new and destroyed system. As expected Grub errors out and we're staring at
So right now we have a broken system. Now do we run to tape, dump | restore, and use some black magic, nope, we simply reboot and choose our safe snapshot 001, boot into that and destroy the corrupt environment 002 and activate the safe one 001 as so
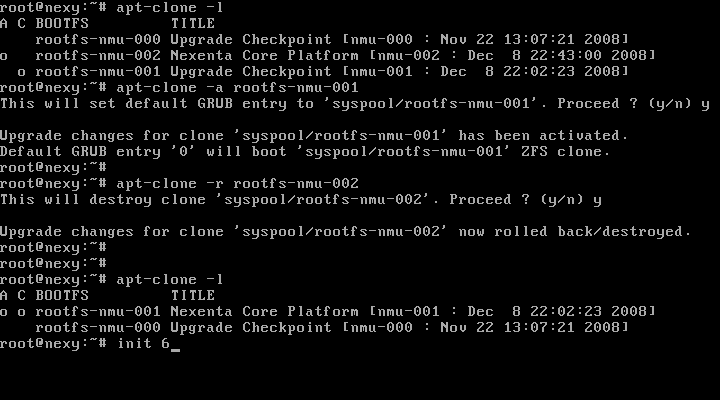
Perfect! Once rebooted, our system is back fully functional. Mind you that taking system snapshots, destroying corrupt ones all take a couple of seconds, and of course does not consume disk space except for the changed disk blocks. Now that we have our server back, let's do something useful with it. Let's "apt-clone install apache2".

Once done, the SMF could not start apache because I had chosen nwam network auto-configuration (think NetworkManager), which apache2 does not like. Anyway, I simply started the SysV script manually, and verified "it works" with a direct telnet connection. You can basically start installing and configuring various server software mostly just like an Ubuntu system. All in all, the Nexenta-2 system is a very promising concept. The integration of advanced Solaris kernel features with GNU userland and attempting to port Ubuntu repos, would basically be paradise. It is however a lot of work. The system is not perfect yet, for example in this beta-1, you cannot install X yet (broken deps). That will surely be resolved by release time. However, rebuilding the huge debian/Ubuntu repos, needs a lot of work. If you have free time to push this interesting FOSS project forward, please do so. Visit nexenta and join their development team. Meanwhile and separately from nexenta, I have been interacting with various open source developers working with opensolaris projects. Unfortunately it seems that Sun is not really making it easy for "outsiders" to work on opensolaris projects. I have heard such comments multiple times, from different people. One would think that after so much time, Sun would start to understand what it takes to build a community around any piece of software! Let me use the moment to shout out: Sun, please cut the community some slack! :)
We start off booting our nexenta NCP2-alpha installation, which we'll be upgrading to beta-1 as we speak. Grub shows the default boot kernel
Once booted, and we log in, let's update apt's cache
I have also used the command "apt-clone" to list the currently available boot environments. Basically, using ZFS snapshots the whole machine state is snapshot'ed resulting in a instantly bootable environment. Currently we only have the default environment "rootfs-nmu-000". Now I am going to use apt-clone to "dist-upgrade" the whole system. If this is new to you (who has never seen Ubuntu :) it basically means you're upgrading the whole system to the latest tasty bits
Note that I have used verbose mode "-v" in order to get more information. After a lot of downloading and dpkg grinding, I now have the latest packages installed. apt-clone has created a new system snapshot "001" and the process ends like so
I have simply hit 'n' to discard any automatic changes, then I used apt-clone to activate the upgraded snapshot as instructed by the on-screen output
Now let's reboot and see what kind of coolness we have
Oh cool, Grub now displays two bootable environments! One before the upgrades and one after. The dates besides each entry make that clear. Great, now let's reboot into the new envrionment and list the available clones (cloned file systems)
Note that the "A" and "C" in the output mean "Active" and "Current". Great, now creating instant bootable system snapshots like that is so useful that it does not relate to software installations only. Say you're running some third party closed source installation application and you're not really sure what's it going to do to your system. Or if the new clueless administrator needs to install something to the server but you think he's probably going to destroy it! In such situations, it's very helpful to manually create a system snapshot. So, let's do just that to create the environment 002 and let's activate it
Now we have our own little safety net. Let's now boot into that new environment. Use apt-clone to make sure "002" is the active and current environment. Then's let's simulate complete system failure. I will not be too creative and will simply delete the kernel and reboot!
Once in Grub, boot the new and destroyed system. As expected Grub errors out and we're staring at
So right now we have a broken system. Now do we run to tape, dump | restore, and use some black magic, nope, we simply reboot and choose our safe snapshot 001, boot into that and destroy the corrupt environment 002 and activate the safe one 001 as so
Perfect! Once rebooted, our system is back fully functional. Mind you that taking system snapshots, destroying corrupt ones all take a couple of seconds, and of course does not consume disk space except for the changed disk blocks. Now that we have our server back, let's do something useful with it. Let's "apt-clone install apache2".
Once done, the SMF could not start apache because I had chosen nwam network auto-configuration (think NetworkManager), which apache2 does not like. Anyway, I simply started the SysV script manually, and verified "it works" with a direct telnet connection. You can basically start installing and configuring various server software mostly just like an Ubuntu system. All in all, the Nexenta-2 system is a very promising concept. The integration of advanced Solaris kernel features with GNU userland and attempting to port Ubuntu repos, would basically be paradise. It is however a lot of work. The system is not perfect yet, for example in this beta-1, you cannot install X yet (broken deps). That will surely be resolved by release time. However, rebuilding the huge debian/Ubuntu repos, needs a lot of work. If you have free time to push this interesting FOSS project forward, please do so. Visit nexenta and join their development team. Meanwhile and separately from nexenta, I have been interacting with various open source developers working with opensolaris projects. Unfortunately it seems that Sun is not really making it easy for "outsiders" to work on opensolaris projects. I have heard such comments multiple times, from different people. One would think that after so much time, Sun would start to understand what it takes to build a community around any piece of software! Let me use the moment to shout out: Sun, please cut the community some slack! :)

