
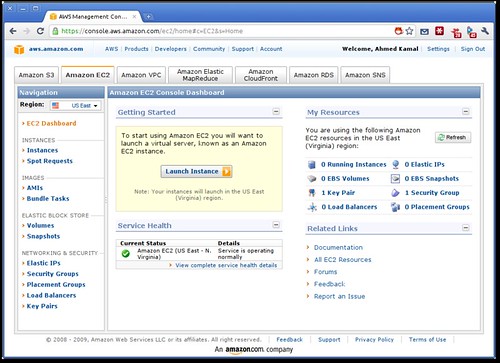
Assuming you have setup an account with Amazon and could login to the Amazon console, you should see
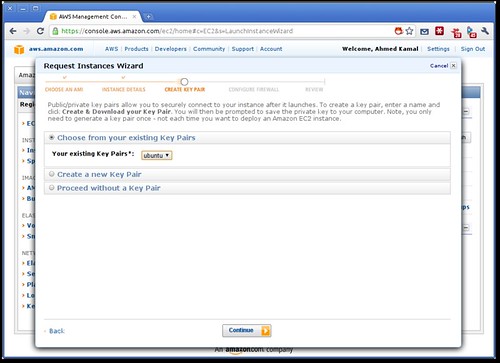
Before we begin, let's set ourselves a "key-pair". Which is basically a ssh public/private key-pair that enables you to login to your instance once launched. Click on "Key Pairs" and click "Create key pair", I'm gonna name my key "ubuntu" and click create
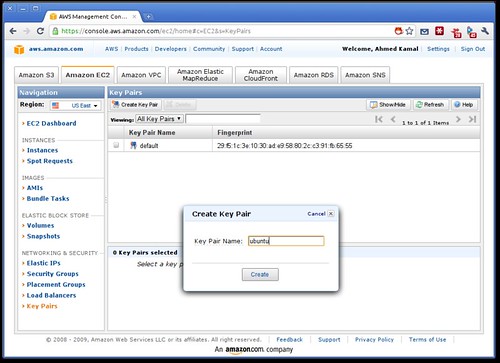
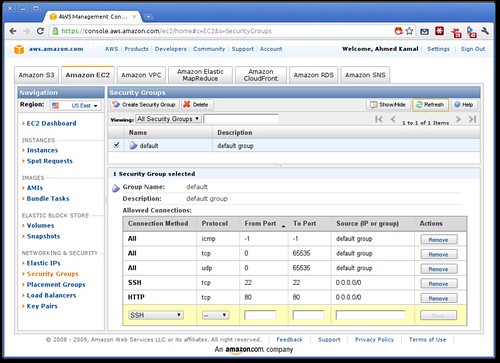
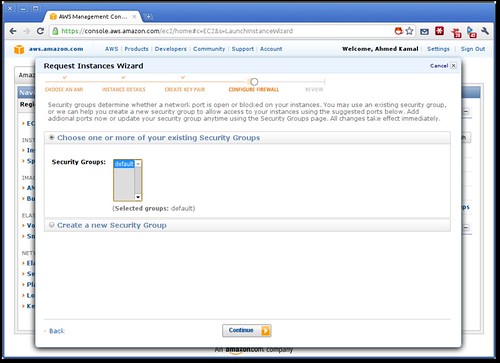
The key is promptly created and pushed for download through your browser. Let's proceed with another "preparatory" setup. By default, EC2's firewall denies all inbound traffic to the instance, which means you cannot even ssh into your instance. Let's open ports 22 for ssh, and 80 just in case we wanna test by running an apache2 server. So, add your from-to ports and source IPs as per the next screenshot and "Save" it
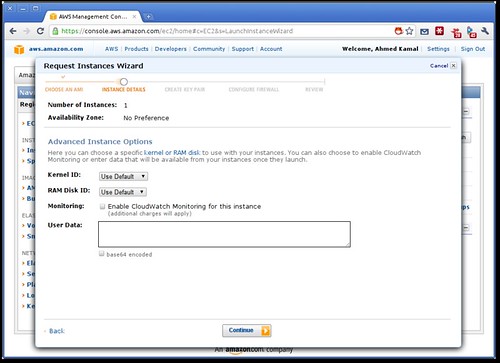
Great, now we're ready to actually launch an instance. Click "EC2 Dashboard" link, click the button "Launch Instance", a wizard starts asking for which AMI we would like to use. An AMI is a template that will be copied to your instance and used to start it. Click "Community AMIs", it may take a moment for the AMIs to load. Now here's a trick, to quickly "zoom-in" on the official ubuntu AMIs, use the following search string "ubuntu-images/" in order to locate EBS based images, and "ubuntu-images-us/" in order to locate instance store based images. This is in no way a "supported" feature of neither Amazon nor Ubuntu, it's just a convenient hack that works today and may not work tomorrow. We choose an EBS based AMI because we plan on launching a micro instance and those require EBS AMIs

click the "Select" button beside it. Click continue and choose a t1.micro instance and click continue a couple of times

You're now on the key-pair page, we simply choose our previously generated "Ubuntu" key pair and click continue
On the firewall configuration page, we choose the "default" security group, since this is what we had configured to open ports 22 and 80 previously
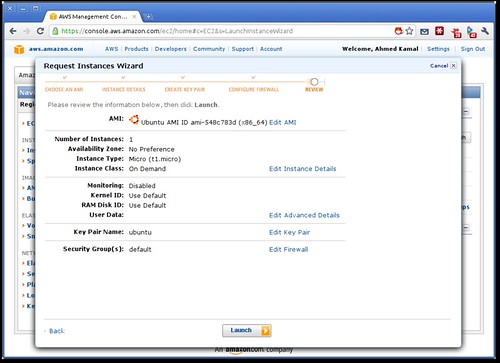
Voila, we're ready. Review and confirm the settings on the page and click "Launch"
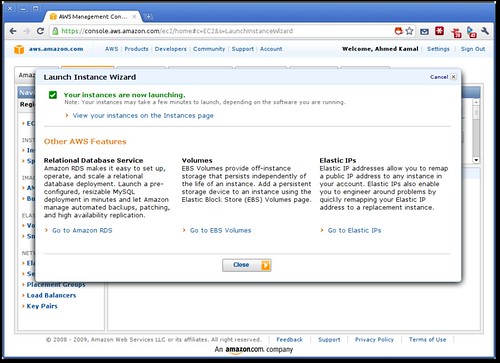
The cloud starts deploying your virtual server and you get the following message
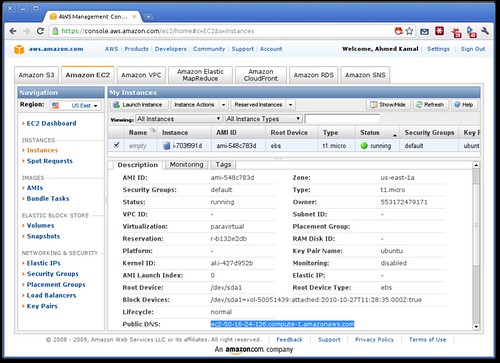
In a minute your instance should be up and running. Let's locate it and login to it. Clicking the "Instances" link, then clicking our only instance so far and locating its "Public DNS" entry setting allows us to ssh to it
Now we're all set, let's jump to our terminal to ssh into the instance. It seems the "ubuntu.pem" key-pair the browser downloaded gets by default permissions that are too open for ssh's taste. Thus we need to "chmod" it to 700, this is the part where I lied about not using any CLI, but hey chmod doesn't really count ;) let's then ssh straight into our instance using the ubuntu.pem key-pair

Awesome! We're in! let's do what the greeting message tells us to "sudo tasksel --section server" and choose to install a LAMP Server. We get asked for a MySQL password twice, the system installs and configures a full LAMP stack for us. Let's visit the apache web server

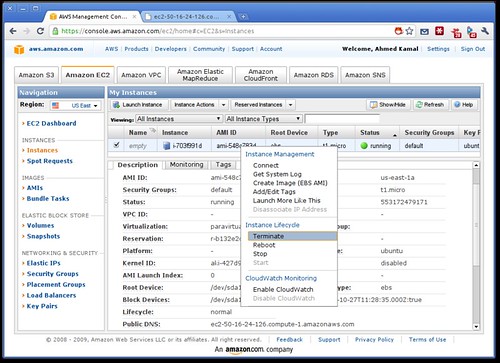
That concludes this graphical guide. As you can see launching your first Ubuntu server instance in the cloud can't really get much easier than this :) Before you go for a cup of coffee, do not forget to "Terminate" your instance. If you don't, you keep on getting billed by the hour for it.
Let me know in the comments if a step was unclear. Also, let me know if there are other topics you'd want me to demo. If you're interested in running Ubuntu in a cloud context and have any doubts, drop by on IRC channel #ubuntu-cloud on freenode, and grab me "kim0"


15 comments:
Awesome work Ahmed, a very clear nd easy to follow guide!
Excellent Job! I'll email you with a few suggestions.
Great work and it's very very easy. keep it ON Eng. Ahmad.
Excellent guide. Only a small error:you posted twice pointnclick-guide-ubuntinthecloud-6, instead of pointnclick-guide-ubuntinthecloud-7.
Thanks
Hey! Thanks for the sharp eye. Fixed
If I terminate it, doesn't it not save the settings and I have to go through this each time I want to use it?
Hey Marc,
EC2 offers 2 types of images, "EBS root" and "instance store" root. The rules go like this:
- if you reboot no changes are lost on either ebs-root or instance store instances
- on shutdown or termination of instance-store instance, the root volume is lost
- on shutdown of ebs-root, the root volume is preserved
- on terminate of ebs-root, the root volume is lost *BY DEFAULT* (although this can be changed)
Thanks for clearing that up. That makes a little more sense now.
Decided to go with the ami-508c7839 i386 AMI.
Important reminder to everyone here. If you follow this process to get the free one, and then terminate it, then you start getting charged. Make sure that when you set up the free one, you choose ebs and you know which one you want. I've terminate it about 3 times before I the above comment about needing ebs. Now it looks like I'm being charged. I'll need to contact their billing to see if anything can be done.
Let's visit the apache web server
What does this mean? Where? I look on the AWS and do not see LAMP installed.
Hi Walsh,
When you executed "sudo tasksel --section server" on the EC2 server and chose LAMP server, this installed apache and mysql on the newly created virtual machine. So visiting its public DNS name using a browser is now going to show the famous "It works" page. The AWS console does not show or care what you install inside the virtual machine
Hi Ahmed,
What options we have for a totally free server?
Hey Carlos, Amazon provides their micro server for free for a year. Check out my other post
http://foss-boss.blogspot.com/2010/10/free-ubuntu-server-for-year-at-amazon.html
Be sure to use a small (<10GB) Ubuntu server AMI
Ahmed,
What small Ubuntu Server you recommend? This is my first time doing this and i don't want make a mistake.
Hi Carlos,
Any of the new Maverick dailies would be 8G root and thus fine. You can pick one from
http://uec-images.ubuntu.com/server/maverick/current/
(If unsure, use us-east-1 32-bit ebs) Note that the AMI-ID will change every few days, since these are daily builds. Thus when you terminate your image (if ever) you'll need to start it from a new AMI-ID
Also note, that data network transfer (like running apt-get install) will make you pay a little (maybe 0.05$/mo) or so. So it may not be entirely free, but then what is :)
Post a Comment