At $dayjob I have been studying Xen Cloud Platform inside out, and all in all I like it a lot! The API rox, it's very extensive and after the first couple of days makes a lot of sense. We're also see'ing initial very good performance. One part that was particularly not straightforward was the getting a console for a running VM. I'll document here my findings
So, let's jump straight in, let's list the console of our centos VM
[root@xcp03 ~]# xe console-list vm-uuid=90e68b99-0408-3e4c-1dd1-ea28e98fbbad
uuid ( RO)             : e845ef9d-2075-0773-119e-08875fb61a1f
          vm-uuid ( RO): 90e68b99-0408-3e4c-1dd1-ea28e98fbbad
    vm-name-label ( RO): kamal-CentOS-5.3x64
         protocol ( RO): RFB
         location ( RO): https://10.100.170.12/console?ref=OpaqueRef:11519923-ee64-21cf-654f-8cce6a7edbb9
The "location" you get is the location of the console for the specified VM. However, if you try visiting that with a VM, you'll get a 404 not found error! Time for some magic. In order to do any of the following, we need a "session" on the Xen Cloud. Since I play with the Xen Python API, I'll use that to get a session
In [7]: import XenAPI

In [8]: session = XenAPI.Session('http://10.100.170.12')

In [9]: session.login_with_password('root', 'woohoo')

In [10]: print session._session
-------> print(session._session)
OpaqueRef:2d600568-c2ca-3f79-b54c-d98420fea1bb
So we now have a session cookie "OpaqueRef:2d600568-c2ca-3f79-b54c-d98420fea1bb". Now let's try to connect to the VNC server. I'll first try to connect by hand (actually telnet) :)
Try 1: Telnet connectionWe need to connect using SSL, which telnet does not support. For that we use "socat", a magical little tool
[akamal@matrix tmp]$ socat TCP4-LISTEN:31337,fork OPENSSL:10.100.170.12:443,verify=0
Let's try to telnet to the locally listening port "31337" and socat will take our connection, wrap it in SSL and connect us to the Xen-API server
[akamal@matrix ~]$ telnet localhost 31337
Trying ::1...
telnet: connect to address ::1: Connection refused
Trying 127.0.0.1...
Connected to localhost.
Escape character is '^]'.
CONNECT /console?ref=OpaqueRef:11519923-ee64-21cf-654f-8cce6a7edbb9&session_id=OpaqueRef:2d600568-c2ca-3f79-b54c-d98420fea1bb HTTP/1.0

HTTP/1.1 200 OK
Connection: keep-alive
Cache-Control: no-cache, no-store

RFB 003.003
Et voila, all the VNC savvy readers will understand that we have been connected to the VNC server. The RFB greeting denotes the begining of the VNC protocol. A few things to note
1- The CONNECT HTTP method is one big line
2- It contains two parts, the console uuid we got first, the second part being "&session_id=" and the session uuid we got from python
3- We connected with HTTP/1.0 and got a response with HTTP/1.1
Try 2: XVP ConnectionCreate a custom java key store. Download and convert the certificate format and import it. This is important because if you don't the java viewer won't accept the Xen server's self signed certificate (yuck?)
cd /usr/java/jdk1.6.0_17/bin
./keytool -genkey -alias kimo -keyalg RSA -keystore /tmp/kimo.jks
[akamal@matrix bin]$ scp root@10.100.170.12:/etc/xensource/xapi-ssl.pem /var/tmp/
xapi-ssl.pem                                                                                                               100% 1108     1.1KB/s   00:00
[akamal@matrix bin]$ openssl x509 -in /var/tmp/xapi-ssl.pem -inform PEM -out /var/tmp/newxapi.crt -outform DER

[akamal@matrix bin]$ ./keytool -import -trustcacerts -file /var/tmp/newxapi.crt -alias XCP_ALIAS -keystore /tmp/kimo.jks
Enter keystore password:
Owner: CN=10.100.170.13
Issuer: CN=10.100.170.13
Serial number: bb01ad6ac4cdc83e
Valid from: Wed Dec 23 15:27:24 EET 2009 until: Sat Dec 21 15:27:24 EET 2019
Certificate fingerprints:
         MD5:  84:90:D7:CF:7F:76:95:9E:2C:52:5A:66:C7:85:DB:58
         SHA1: BB:7B:C9:B1:47:19:42:F6:75:02:84:55:A1:05:67:7B:A6:B9:4E:82
         Signature algorithm name: SHA1withRSA
         Version: 1
Trust this certificate? [no]:  yes
Certificate was added to keystore
Perfect, now let's get the XVP source code. XVP is basically tightvnc with protocol additions that the Citrix hackers have added to better control VMs
[akamal@matrix tmp]$ wget -q http://www.xvpsource.org/xvp-1.3.2.tar.gz
[akamal@matrix tmp]$ tar xzf xvp-1.3.2.tar.gz
[akamal@matrix tmp]$ cd xvp-1.3.2/
[akamal@matrix xvp-1.3.2]$ cd viewer/
Apply the following patch
diff -ur ./HTTPSConnectSocket.java /tmp/xvp/xvp-1.3.2/viewer/HTTPSConnectSocket.java
--- ./HTTPSConnectSocket.java   2009-11-30 15:37:05.000000000 +0200
+++ /tmp/xvp/xvp-1.3.2/viewer/HTTPSConnectSocket.java   2009-12-29 19:14:56.165479016 +0200
@@ -46,8 +46,10 @@
     ssl = (SSLSocket)ssf.createSocket(proxyHost, proxyPort);
     ssl.startHandshake();

+    System.out.print("CONNECT " + host +
+                             " HTTP/1.0\r\n\r\n");
     // Send the CONNECT request
-    ssl.getOutputStream().write(("CONNECT " + host + ":" + port +
+    ssl.getOutputStream().write(("CONNECT " + host +
                             " HTTP/1.0\r\n\r\n").getBytes());

     // Read the first line of the response
@@ -55,8 +57,8 @@
     String str = is.readLine();

     // Check the HTTP error code -- it should be "200" on success
-    if (!str.startsWith("HTTP/1.0 200 ")) {
-      if (str.startsWith("HTTP/1.0 "))
+    if (!str.startsWith("HTTP/1.1 200 ")) {
+      if (str.startsWith("HTTP/1.1 "))
        str = str.substring(9);
       throw new IOException("Proxy reports \"" + str + "\"");
     }
Build the code
[akamal@matrix viewer]$ make
javac -J-Xmx16m -target 1.1 -source 1.3 -nowarn -O VncViewer.java RfbProto.java AuthPanel.java VncCanvas.java VncCanvas2.java OptionsFrame.java ClipboardFrame.java ButtonPanel.java DesCipher.java CapabilityInfo.java CapsContainer.java RecordingFrame.java SessionRecorder.java SocketFactory.java ReloginPanel.java HTTPConnectSocketFactory.java HTTPConnectSocket.java HTTPSConnectSocketFactory.java HTTPSConnectSocket.java InStream.java MemInStream.java ZlibInStream.java XvpConfirmDialog.java
jar -J-Xmx16m cfm VncViewer.jar MANIFEST.MF VncViewer.class RfbProto.class AuthPanel.class VncCanvas.class VncCanvas2.class OptionsFrame.class ClipboardFrame.class ButtonPanel.class DesCipher.class CapabilityInfo.class CapsContainer.class RecordingFrame.class SessionRecorder.class SocketFactory.class ReloginPanel.class HTTPConnectSocketFactory.class HTTPConnectSocket.class HTTPSConnectSocketFactory.class HTTPSConnectSocket.class InStream.class MemInStream.class ZlibInStream.class XvpConfirmDialog.class
Now let's connect using one more magical and undocumented command line
[akamal@matrix viewer]$ java -Djavax.net.ssl.trustStore=/tmp/kimo.jks -Xmx64m -jar VncViewer.jar HOST "/console?ref=OpaqueRef:11519923-ee64-21cf-654f-8cce6a7edbb9&session_id=OpaqueRef:2d600568-c2ca-3f79-b54c-d98420fea1bb" PORT 443 PROXYHOST1 10.100.170.12 PROXYPORT1 443 SocketFactory "HTTPSConnectSocketFactory"
Initializing...
Connecting to /console?ref=OpaqueRef:11519923-ee64-21cf-654f-8cce6a7edbb9&session_id=OpaqueRef:2d600568-c2ca-3f79-b54c-d98420fea1bb, port 443...
HTTPS CONNECT via proxy 10.100.170.12 port 443
CONNECT /console?ref=OpaqueRef:11519923-ee64-21cf-654f-8cce6a7edbb9&session_id=OpaqueRef:2d600568-c2ca-3f79-b54c-d98420fea1bb HTTP/1.0

Connected to server
RFB server supports protocol version 3.3
Using RFB protocol version 3.3
No authentication needed
Desktop name is XenServer Virtual Terminal
Desktop size is 640 x 384
Using Tight/ZRLE encodings
Closing window
Disconnecting
Updates received: 2 (40 rectangles + 1 pseudo), 0.02 updates/sec
Rectangles: Tight=0(JPEG=0) ZRLE=0 Hextile=40 Raw=0 CopyRect=0 other=0
Pixel data: 983040 bytes, 4295 compressed, ratio 228.88
RFB socket closed
et voila, here's how it looks when it works
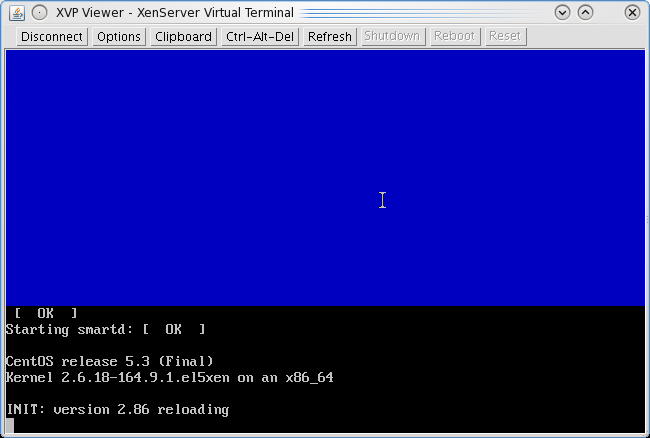
Yoohooo, hurray for undocumented ^#^&@%^#%
This post would not have been possible without great help from a friend and guru developer
Ahmed Soliman. Also
Abdelrahman Hussein helped with some final touches
Hoping that post is of help to some poor souls. I still like XCP though :)